Thursday, December 5, 2013

Living Room Loving!

Since moving into the house we have been working on a 1000 and 1 projects that seem to be never ending! Rooms are are finally starting to come together and so that is a pretty exciting feeling!

Our living room is finally not feeling like a large void space so I figured I'd share it with you guys, still some pieces to find and some life to add in here but I am pretty happy with it so far!

First off here are the before pictures (sorry they are so tiny I saved them off the mls listing and they were super crappy resolution)


This was the ONLY non wallpapered and freshly painted room in the house. But of course it was taupe and blah and I just couldn't live with it so we painted it white along with the rest of the house to start with a fresh slate!

We were able to re use the curtains we had made for our old apartment which I was super happy about cause I still love them.


Yes our whole entire lives are antique and aqua and this is something I have come to accept lol, I can't help it. It's all I ever seem to be drawn too!

Next we had a large empty back wall to the room and it needed a project! I was inspired by this photo I saw online of a re-purposed mantle without a fire place and I went with it!


I found a dirt cheap  used wood mantle on craigs list. I painted random patches in aqua, used a crackle medium over them and then painted over it all in white to get this aged look to it. I also sanded it a bit and added a few coats of varnish to finish it off.


I am slowly working on the back wall behind the couch but it`s a bit tougher. I am hunting down antique ceiling medallions used for lighting and refinishing them all in white to cover to create a textured accent wall. The new ones are insanely over priced so I refuse to give in and buy them (ones the size of the large ones pictured run about 85$ - $125). 4 down a million more to find! Also how magical are our peaked door ways!!


The back wall with the tv and storage are still super lack luster minus our beautifully refinished sideboard which we are using as a tv stand. I am still on the hunt for a piece to use as dvd storage. And we also plan on wall mounting the tv and hiding the boxes away in the side board drawers.


So not fully complete but I am super happy with  how it is coming along! The master bath is SOOOO close to being done as well as the dinning room. So be expecting posts of those rooms soon!


Monday, December 2, 2013

Holiday DIY: Homemade Baileys

The holidays are here and with it comes all the parties come all the boozing! We are big fans of ceasers and baileys for the holidays in our family.

A close family friend has been making his own homemade Baileys for as long as I can remember. Last year I decided to try my hand at it and now I will never go back to buying it! This version is so much creamier and goes down do much smoother, no after bite!

With loads of parties to go to needing a little gift to give and lots of family gatherings coming, it's the perfect time of year for you guys to test out this recipe yourself!

What You'll Need


INGREDIENTS 

-1 cup wild turkey 
-1 cup 1/2 &1/2 
-1/2 tsp coconut extract 
-1/2 tsp almond extract 
-1 tin condensed milk 
-3 eggs 
-3 tbsp choc. syrup

Put it all in an blender, blend for 1 minute and you're ready to go! 1 bottle of wild turkey makes just over 3 batches and each batch fills just about 1 empty wine bottle. I tend to keep empty wine bottles in the fall for when I make this and I have a couple more decorative ones on had for when we have company or to give it as a gift. 


I have also packed them up in mini bottles attached to mason jars with coco mix and marsh mallows like the idea bellow. The hard part is finding mini unlabled bottles so stock up if you see any throughout the year!


And lastly you can set up a super cute little coco station like I did for our party last night. People can make their own coco and add baileys, great for when you have family over. I also make coffee ice cubes to have on hand for those who like to drink it cold. They are stowed away in my frezzer in zip lock bags.


Hope every ones week is off to a great start and let me know what you think of the recipe!


Tuesday, November 12, 2013

Mason Jar Candles

So i have a semi addiction to mason jars, whether they be new limited edition vintage look blue tint jars (which I used for this project) or gorgeous vintage ones with clip tops and glass twist on tops that I find while antiquing. I use them for everything around the house from baking supplies in the kitchen or q-tips and cotton pads in the bathroom. I probably have over 100 lol it`s clearly becoming a problem.

When we first moved into the house this summer I found a bunch of rogue ones in the shed out back and decided to make candles with them since  most were missing tops of frankly to crusty for me to every want to put things I use into, even after cleaning them lol.

My first time around I made quite a few mistakes and learned from them so this time I had a list of what not to do`s. Since a lot of you seemed interested in making some as well I figured I would share with all of you what I learned the first time around. Not to mention it`s the perfect time for year for some of you to get into this D.I.Y p0roject because they would make great Christmas presents!


WHAT YOU WILL NEED:

-Mason jars (medium and small jars work best)
-Brick of wax
-Clothes pins
-Wicks (you can buy pre cut ones but I opted to buy a large spool of them)
-Wax melting tin
-Wax thermometer 
-Scented oils and or scented wax tablets

It is a little pricey to get started but if you are planning on doing them for presents it will for sure balance out. Not to mention once you have all the supplies you`re set for the next time.

I like to buy most of my crafting supplies at Micheal`s. They are a little over priced but they have amazing coupons, and even have an app you can download on your phone that will update with all the weekly 40% off coupons. Before I got started on this project I spent 2 weeks hoarding coupons and making multiple trips to get the best deals.

You can buy the wax melting tin in a little starter pack at micheals for $40 which includes the thermometer, some tin forms for smaller candles, some scents, a small brick of wax and some wicks. I used my 40% coupon on this and then got the at cash 50% coupon for the following week. I then went back and bough that giant brick of wax which is $50 before my 50% off coupon. And at the same time used the 40% weekly coupon to get the large spool of wicks which was $40 before discount. I also bought some oil scents.

Now you don`t have to be a Micheal`s coupon addict like me to do this project but it took it from over $130 to start to about $70 so it`s well worth it. Alright enough with the cheapo talks onto the crafting.

Start by filling a large pot of water up halfway and placing it on the over on high to start boiling. I have messed up a large pot over the years from crafting so I use that for this type of thing. If you don`t have a pot you aren`t worried about messing up, be sure to stop by a value village or second hand store and pick up a dumpy old pot cause they will get messed up.

Now line up all your jars measure out the wicks and place them with the clothes pins on the mouths of your mason jars. Getting the wicks centered can be painfully annoying as an fyi.


Make sure the wick and clothes pins are placed sideways on your jars to make it easier to pour later


Break of some wax from your brick ( I used a hammer and crowbar). Place it in your wax pot with the thermometer clipped inside and set in all inside the pot of boiling water.


Stir every once in a while and check water levels in pot as it evaporates be sure to add more. Once all wax is melted (takes at least 20 minutes) check thermometer and wait till it hits the optimal melting point temp marked on the specific wax you purchased. Mine was 125c. Once you hit your temp level add in scents or color additions (all can be purchased at micheal`s where wax is sold). Stir and prepair to pour.

Pouring is CRUTIAL in how your handles turn out. SO READ THIS PART CAREFULLY.

Place an oven mitt on your non pouring hand and use it to help you steady your pour. POUR AS SLOWLY AS POSSIBLE. 

If you do not slow pour you will end up with massive air bubbles on the inside of your candle and will impede it from ever burning properly or for a long period of time. This was my big mistake I made the first time around and most of my candles were pretty much useless due to this


Allow wax to settle and harden for a few hours and then melt a bit more wax. During the hardening of the wax your candle will sink down around the wick. Go back in again with a slow pour to fill in these sunken parts, ensure to not just fill sunken parts but pour enough to reach the mouth on all sides of the candle so that after setting you can not tell this second step was done. Once those have set you are good to go!


Be sure to let me know if any of you guys try this out and  feel free to write me here if you have any questions! Happy crafting!


Tuesday, October 29, 2013

Getting Back In The Swing Of Things

After almost a year of not blogging (and probably alienating my thousands of weekly readers), I am ready to get back in the swing of things!

It has been a pretty tough year in our family and that is pretty much what stole me away from all my blogging fun. And all though it may be a bit personal many of you have followed me on the internet for so many years and shared so many events in my life with me. Be they good or bad and I feel like I owe you all a little explanation for my sudden retreat from the web.

During the holiday season last year my father fell ill. Shortly after we found out he had pancreatic cancer and did not have very long to live. He went faster than any of us imagined and within 8 weeks of starting to feel ill he was gone.

8 weeks is barely enough time to accept you have cancer let alone say the things that need to be said or tie up loose ends. My fathers passing at the young age of 56 left a huge hole in all of our lives as he was the life of the party, the performer and the best friend that held us all together during our struggles in life. He was always there to give you a huge bear hug, discus hard topics over a scotch or sing you your favorite song with his trusty guitar.


Since I was little I was for sure a daddy's girl. Following him to his baseball games to be the bat girl, or going fishing at the crack of dawn at the cottage. So I stayed strong for him through his short illness. Dressed nice for him for every visit to the hospital, kept a smile on my face for him and kept him laughing right till the end.


I have never been one to sit around feeling sorry for myself or wallowing in sadness. So after my father passed I gave myself 2 weeks off from life. 2 weeks to be a sloth in my pjs all day and eat all the junk food and cry my eyes out. But once those 2 weeks were up I went back to work and went back to all my normal routines. Sure certain situations still bring me to tears, and the sound of his favorite songs in the background while out in public makes me want to run and hide. But these are all things I would have to get used to. 


Its been 8 months now since my handsome and wonderful father Donald J Robichaud passed away. Nothing will ever ease the pain. But with each passing day it becomes a little easier to see his photos, and to smile when I hear his favorite songs(he was really in to music) instead of crying.

I would give anything for one more year, month, week or even day with my day. But I feel so glad that knowing there was nothing the doctors could do for him, my father passed so fast and was not made to live months in the excruciating daily pain he felt. 

I gave been so lucky to be supported by my husband, family and extended surrogate family (you all know who you are) this past year and cannot imagine getting through any of this without you guys.

So with all that being said and off my chest, I am now back! We bought a house this year so be expecting a million house reno and deco updates. And thanks to all of you for the emails over the past year. Some worried some letting me know how much you missed my posts. It truly meant a lot to know you guys even noticed I was gone lol.


Sunday, January 13, 2013

Knitted Love Giveaway!

A friend of mine has recently started out on a new online knit shop! Her name is Angel and she is an incredibly sweet girl I have known since high school. We are both super excited to bring you this awesome January giveaway!

She learned to knit basic garter stitch as a child but always made mistakes and never really put any effort into trying to perfect. She picked up needles again a few years ago and was given a book and was able to make a pair of leg warmers. Last December she saw a friend knitting really nice scarves and I decided to give it a go again and with the help of the Internet and she hasn't been able to stop since. Her favorite place to knit is in my bed while watching tv lol. Nothing like a good little mental escape before bed!

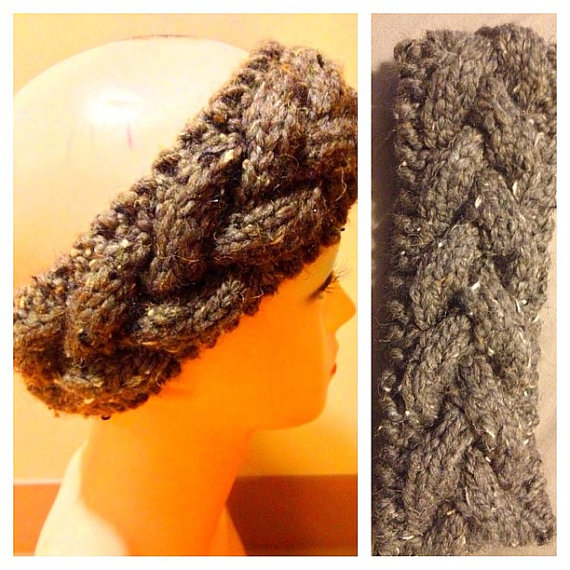
Now a year into her knitting addiction she has decided to open up a little Etsy Shop to share all her knitted treasures with you guys! Here are some pieces currently up in the shop.


Alright now for the fun part! Giveaway time! She has been sweet enough to offer up this gorgeous infinity scarf that you will all have the chance to win!

She is currently trying to come up with a suited name for her Etsy shop so I thought it would be fun to make it a part of the giveaway!

Here is how you can enter to win:

1.You can get one entry to this contest by simply commenting " I Love The Knitted Love Giveaway" along with your idea for a name for her knit shop on this blog entry

 2.You can also get an entry by following us both on Twitter and tweeting " Dearest @MissWrenxo  and  @LoveBugAngel  I want to win the #Knitted Love #Giveaway"

3. Third way to enter: Post the giveaway photo on Instagram along with  "@misswrenxo  #knittedlovegiveaway "

*plz make sure you guys are leaving me a way to get a hold of you if you win*

You can also find Angel on Facebook or by following her on IG @lovebugangel

Good luck everyone, I will be drawing for the scarf next Sunday!


Wednesday, January 9, 2013

Sorry For My Lack Of Blogging!!

Lets just say my new year isn't off to a good start. I've been wallowing in my own sorrows a bit and not in the mood to blog.

 But I haven't forgotten about you all! I promise to get back on my blogging roll soon! Also I have a fun giveaway coming up this week for you guys so keep your eyes pealed!